Expense and travel policies are important when you want to compensate your employees for the expenses they incur while working for your organization. Expenses and travel policies dictate how employees can claim their expenses and how the approval process takes place. Expense and travel categories help in categorizing the spends and assigning it to the various buckets for accounting purposes.
Keka allows you to setup your expense and travel policies as well as the various expense categories in your firm. Let’s take a look at how to set up your expenses and travel policies.
Go to Org (1) from the left navigation pane on your Keka HR Portal. Select the Expenses & Travel (2) tab and go to the Policies & Settings (3) tab.

Creating Expense & Travel Categories
First, you need to create Expense & Travel Categories and then create Expense & Travel Policies You can then add the categories you've created to the various policies you create.
To create expense & travel categories, go to the Expense & Travel Categories tab, and then click on + Add Expense Category.

On the Add Expense Category window, you can add the various details pertaining to the expense category you’re adding. Here are the major fields to fill.
Expense category name and Icon- You can choose a name for the expense category that can be used to identify the expense category. You can also add an icon which can help you identify the expense category.
Expense code: Add a code that you have been using in your accounting process or create a new code which can be used to categorize the expenses filed under this head in your accounting system.
Usage Type: There are several usage types that are available to choose from. This helps you further categorize the expense. Some expenses are paid out per day while others are based on the actual expenses or the distance traveled. This defines the attributes that are defined for the expense category.
For example, if you select mileage, the fields that the employees need to enter will include attributes such as expense title, currency, amount, and the distance covered.
If you choose to travel instead, your employees claiming the expense will include additional details such as the Travel from and Travel to destinations as well as the dates.
Standard Attributes: These are the fields that the employees claiming this expense must fill in. All usage types will have a set of pre-defined attributes. However, you can also add more attributes if you want more data from the employee.
You can add an Attribute Name, and select a Field Type like textbox, date or number. You can also select if this attribute type is required when claiming an expense or making an advance claim. You can also make this field mandatory or non-mandatory.
Enter the details in these fields for the expense category you want to add. After you’ve done it, click Save Expense Category.

This will add the new category to the expense categories you’ve already configured in your system.
Creating Expense & Travel Policies
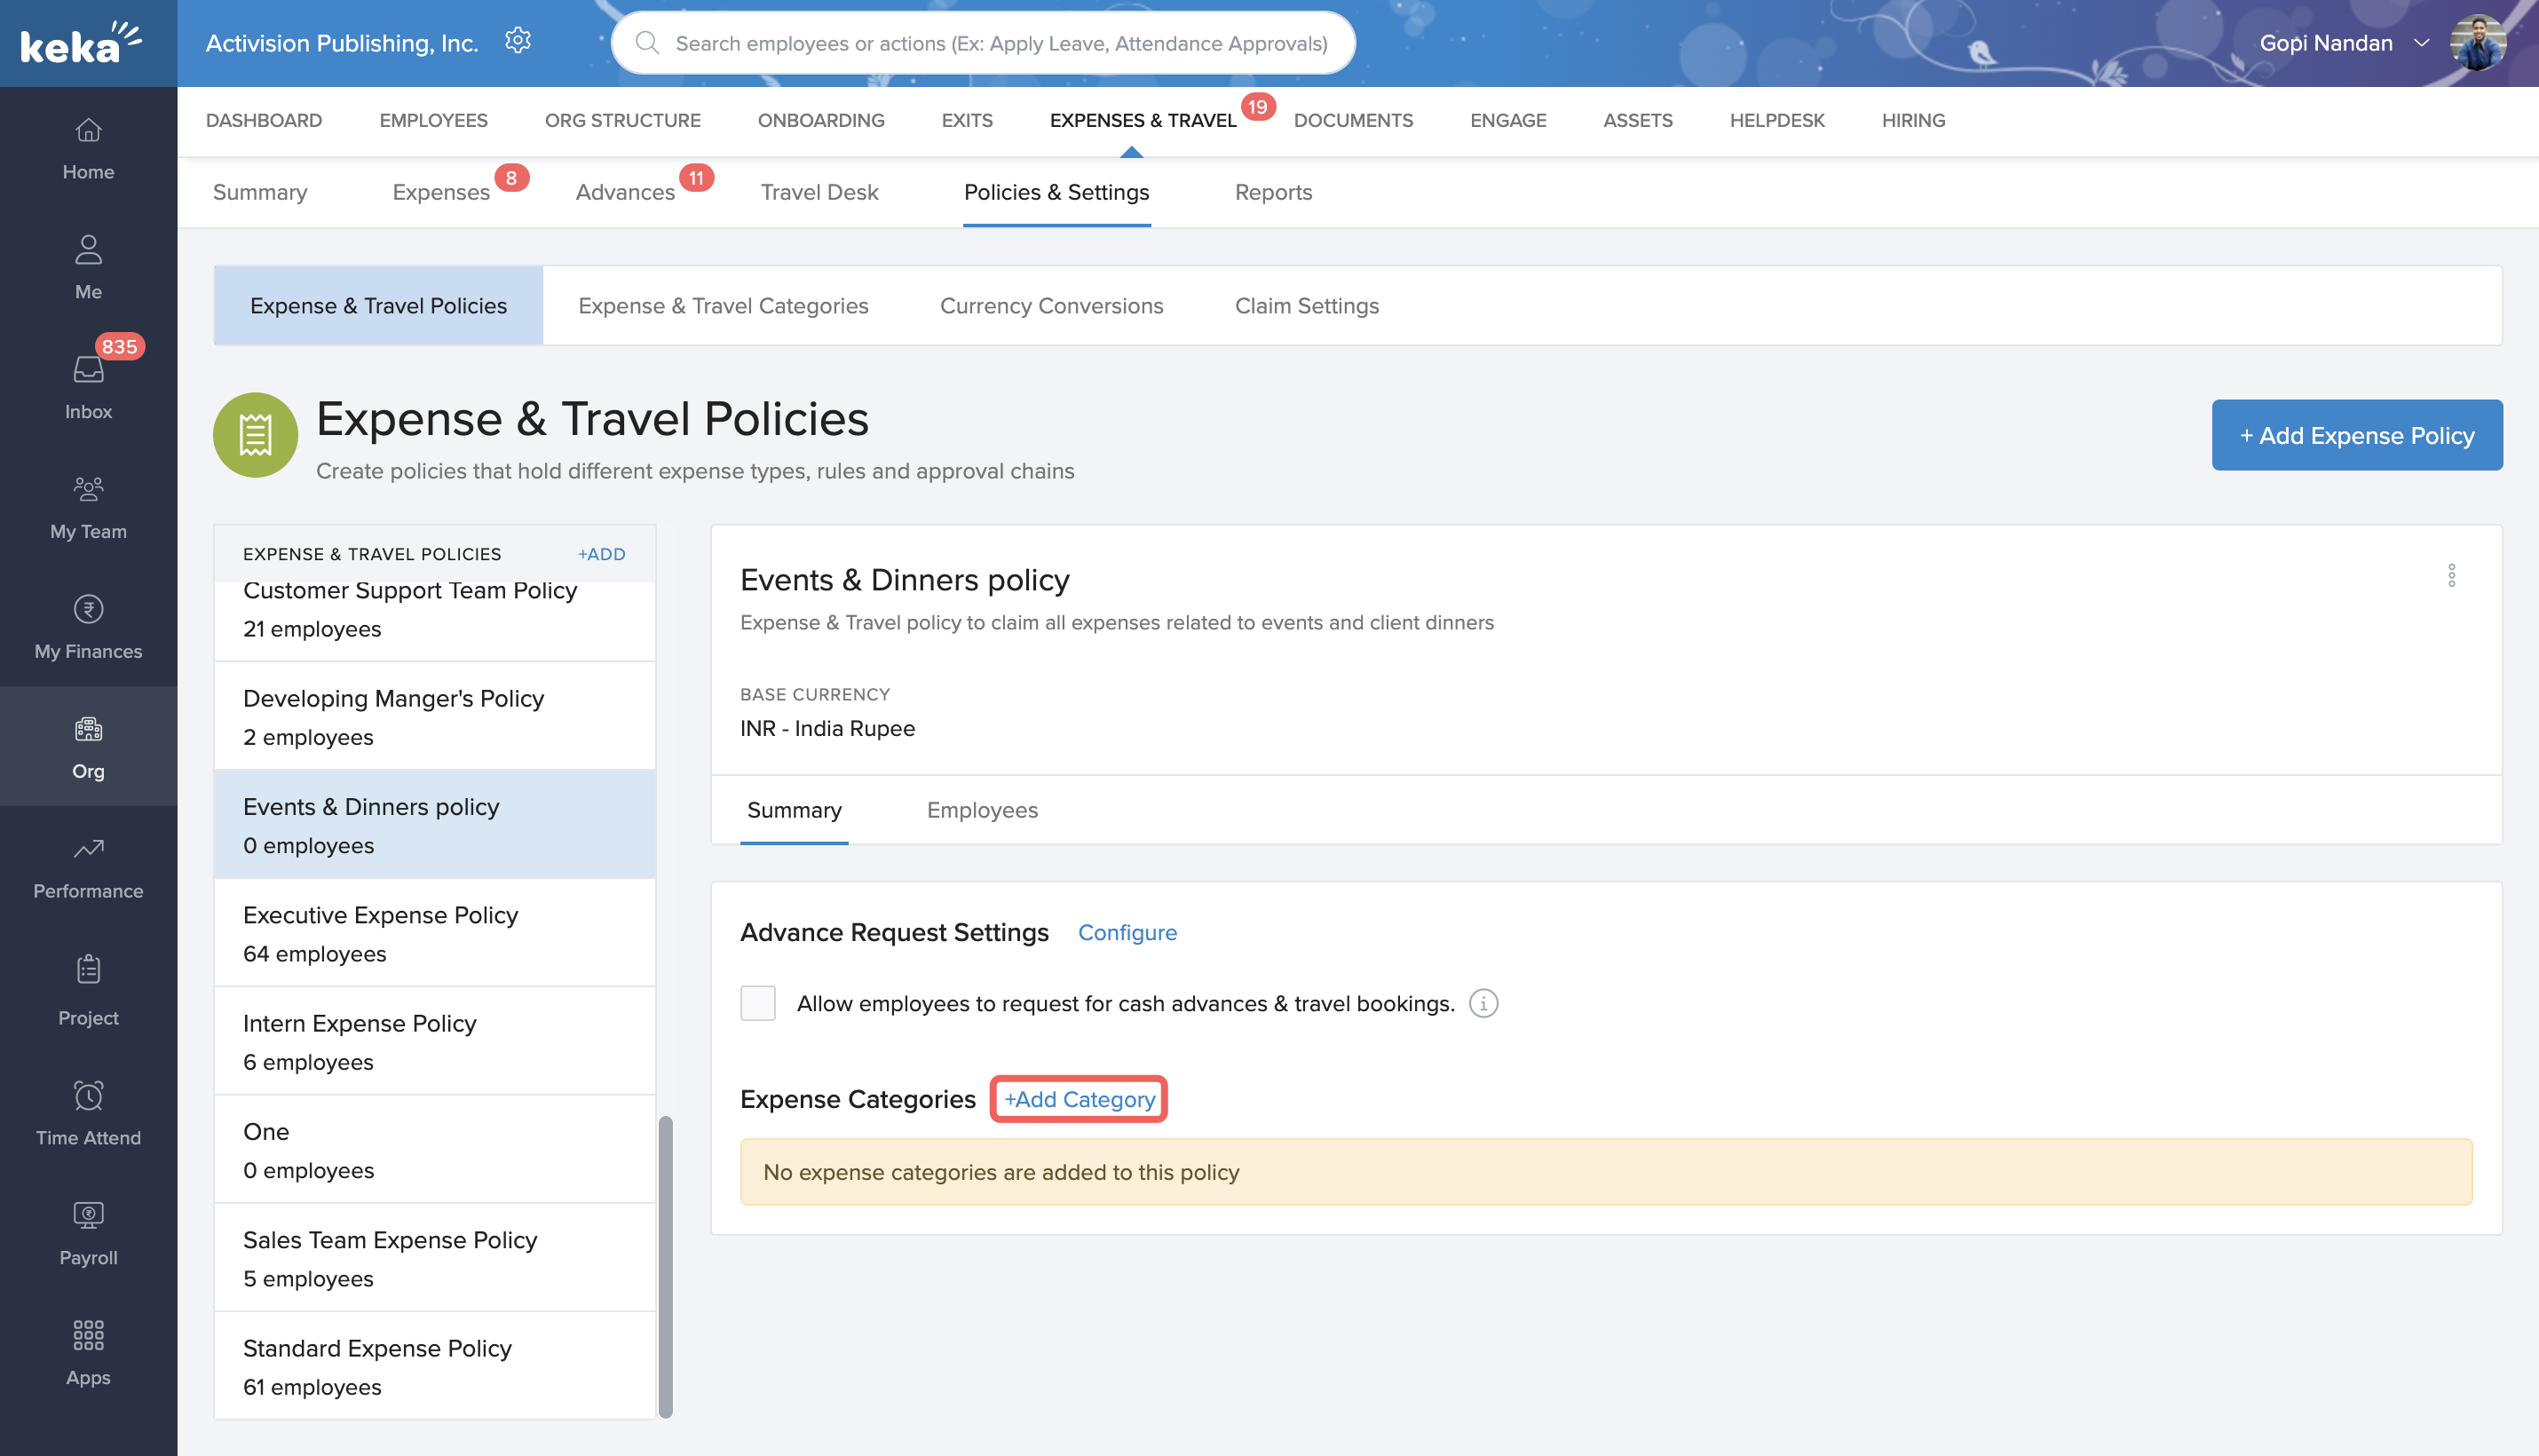
Go to Org (1) from the left navigation pane on your Keka HR Portal. Select the Expenses & Travel (2) tab and go to the Policies & Settings (3) tab.

From this page, you can add your expense and travel policies. Ensure you're on the Expenses & Travel Policies tab. To add a new policy, click + Add Expense Policy.

On the Create New Expense Policy page, you have to enter the details for the new policy you want to add.
Enter a Name for the Policy, Description, and the Base Currency.
You can also select the option where Employees can claim the expenses for a future date. This is different from advance claims and will not affect any advance claims. For example, if your employee has booked tickets for air travel that is coming up at a later date, they can claim these expenses before the actual date of the flight.
Approval chains – Approval chains are important in expense claims. You can determine the different levels of approvals for the various expense claims and who are the people who will approve these claims. While setting an approval level, you can also choose if the expense claims get auto-approved when the approver has not taken any action on these claims.
You can also choose to have different approval chains for expenses for amounts exceeding a certain amount that you can determine.

Once you have entered the necessary details, click Create Expense Policy.

This will save the expense policy you have created. You can add as many policies as you want for the various expense categories and other parameters you have. Repeat the above steps to add other expense and travel policies.
You now have to configure the expense policy that you've created to enable employees to claim expenses under this policy.
First, select the policy you want to configure from the left pane and from the Summary tab, click Configure.

You can choose if the employees should be allowed to claim cash advance for the expenses defined under this policy here. If you want to enable this, select the checkbox on the screen. Further, you will get the option to determine the period within which the employee who has claimed cash advance have to submit bills or receipts to support the expense claim. Enter the desired number of days and click Save.

The next step is to add expense & travel categories you have configured to the policy. To do this, click on + Add Categories from the summary section of the policy.
In the Add Expense Category window, you will find all the categories that have been created in your portal. Select the expense categories that you want to add to the policy from the list. Click Save to add these categories to the policy.

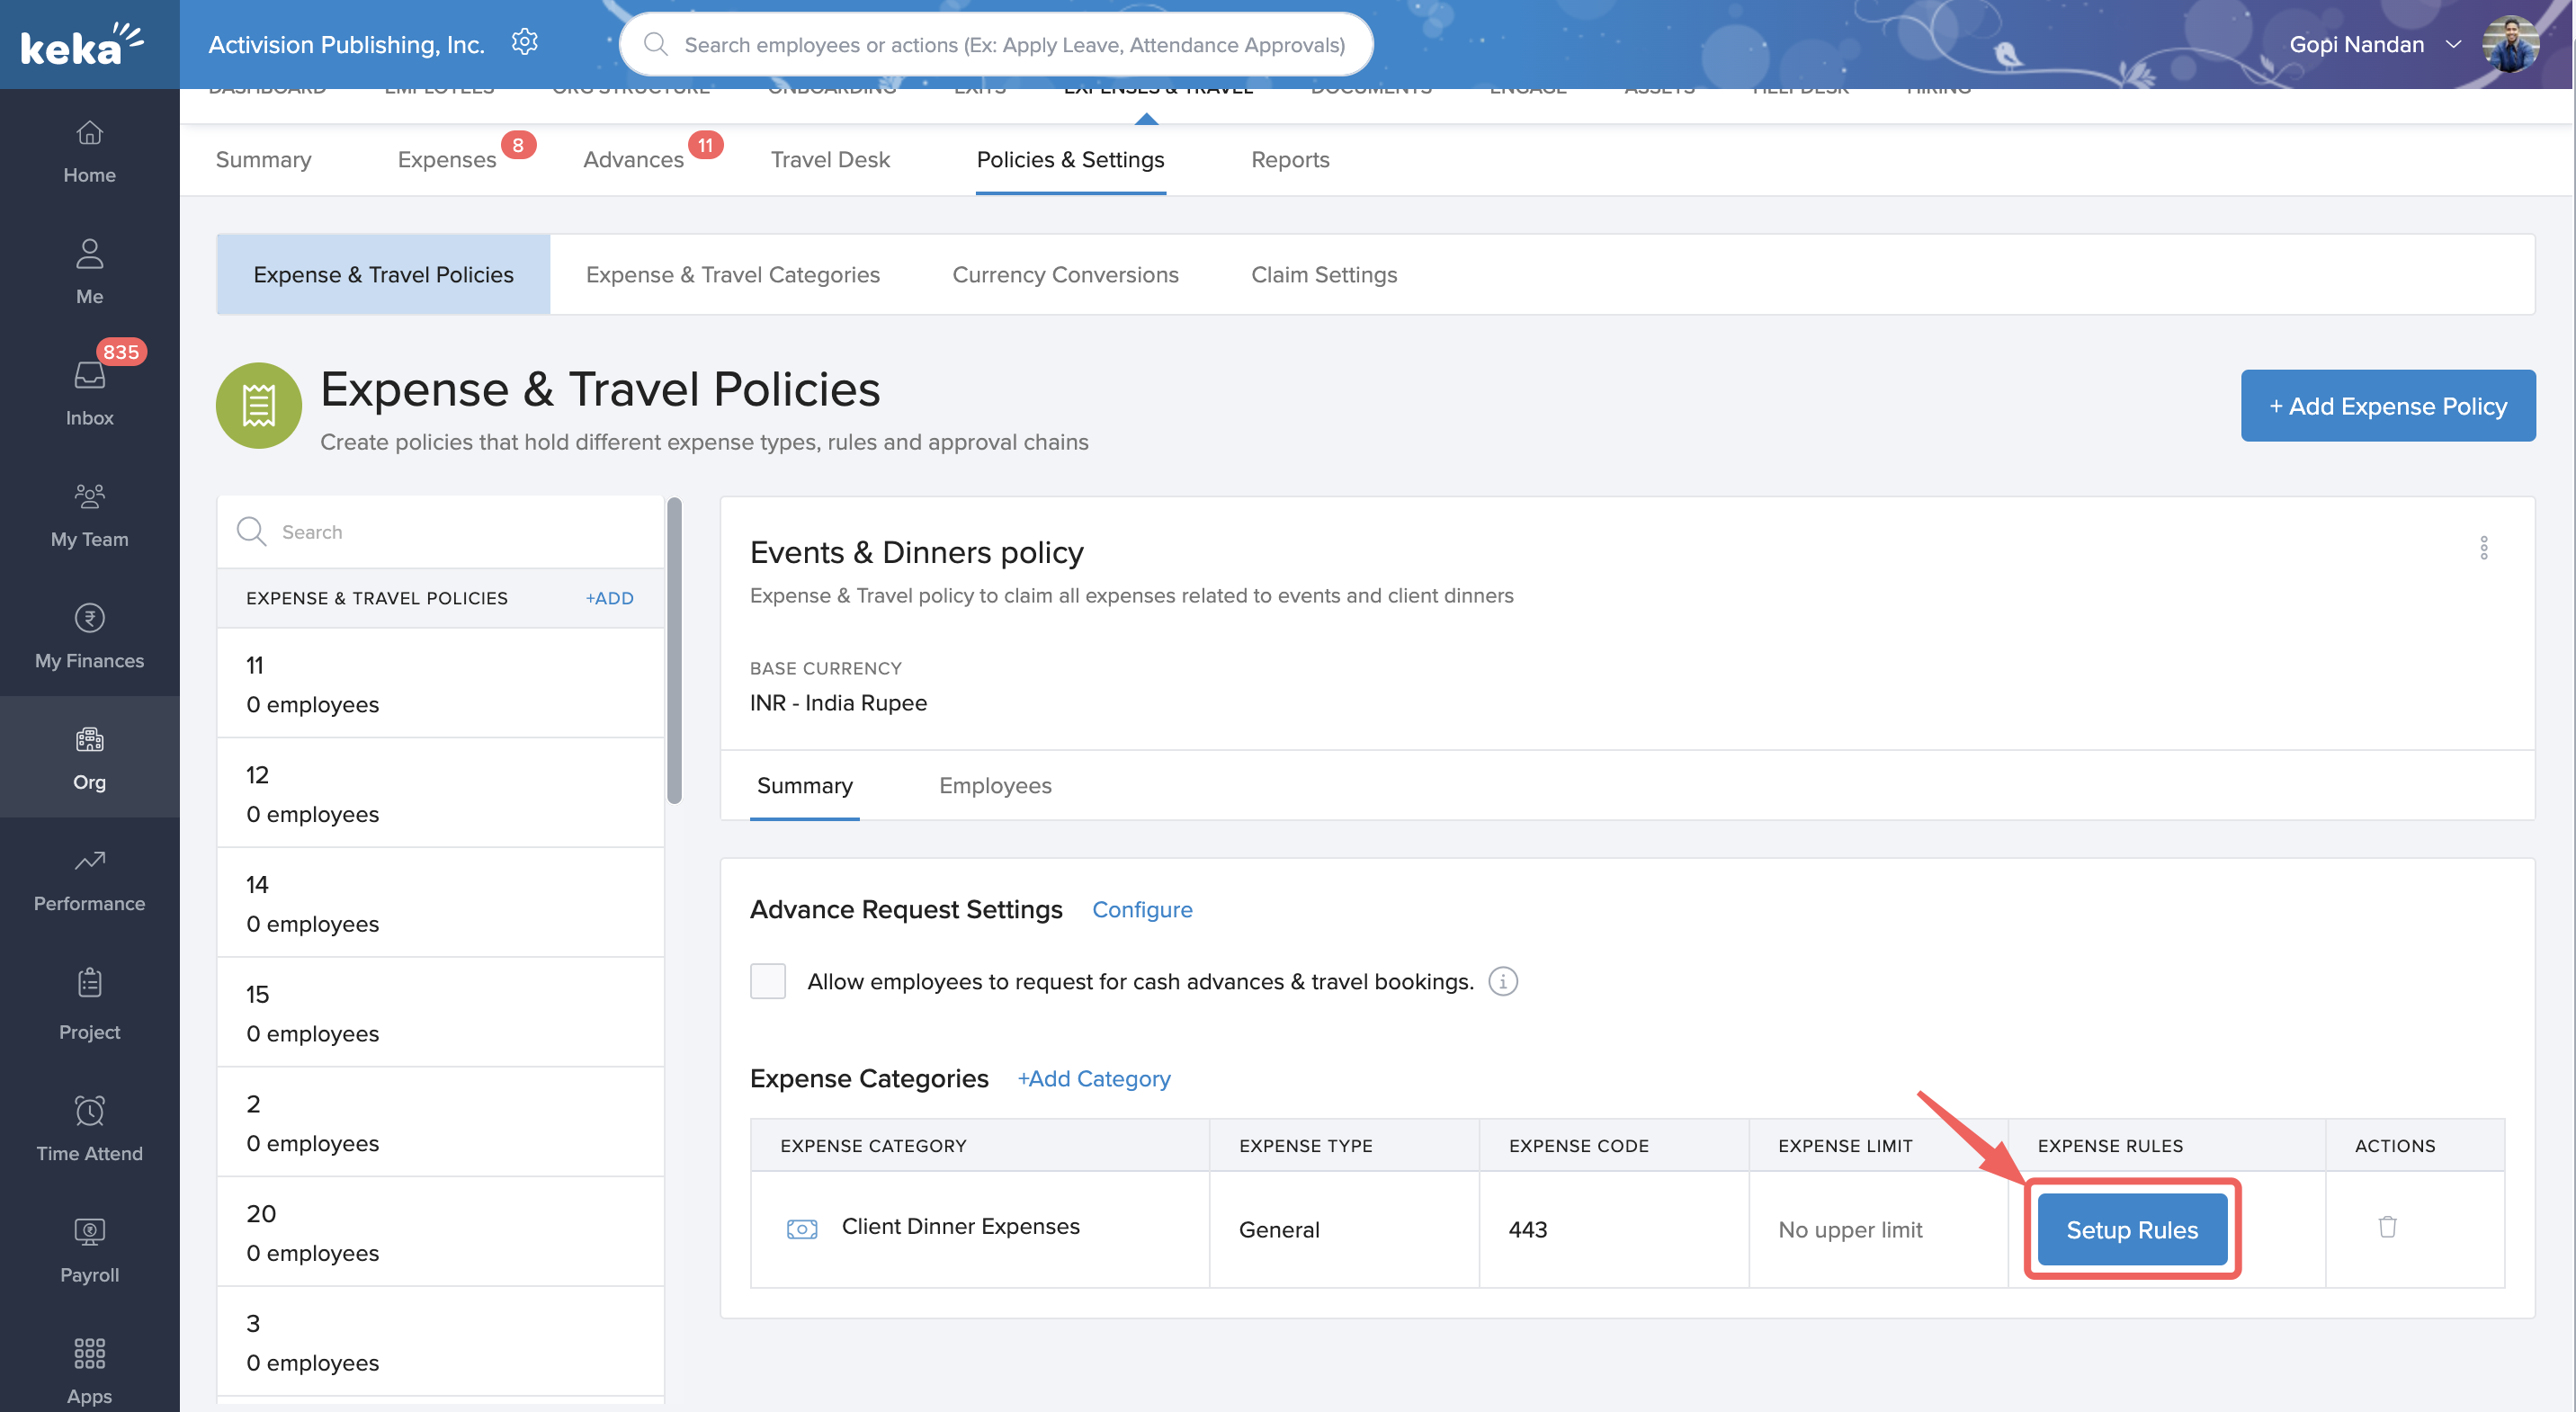
In the window that opens up, enter the necessary details to define the rules that govern how the expenses can be claimed.
First option is to limit the amount that can be claimed under expense for a particular period of time.
You can choose to limit the maximum amount that can be claimed per day, month, quarter, half year or year. You can also add multiple levels of limits as shown in the image below. Click on the + icon to add a new limit.
You can also set a limit to set the number of times this claim can be made. You can set the maximum number of times the expense claim can be made in a day, month, quarter, half year or year.
Another option you have is to define the number of days within which the expense claim has to be made after incurring the expense. You can also select the option which will mandate the employees to choose a project or a cost center when submitting the expense claim.
Finally, you can also define if a note is needed along with the expense and if a receipt is needed. The option allows you to set an amount limit above which both the note and the receipt becomes mandatory.
After you've entered the decisions as you wish, click on Save Rules to set up the rules.

You can update the rules by clicking on Update Rules from the summary section of the policy if you want to change the settings at a later date. You can also delete a category by clicking on the Delete icon in this window.

That's how you create and manage Expense & Travel Categories and Policies. More questions about this? Talk to our product experts today!
Was this article helpful?
That’s Great!
Thank you for your feedback
Sorry! We couldn't be helpful
Thank you for your feedback
Feedback sent
We appreciate your effort and will try to fix the article